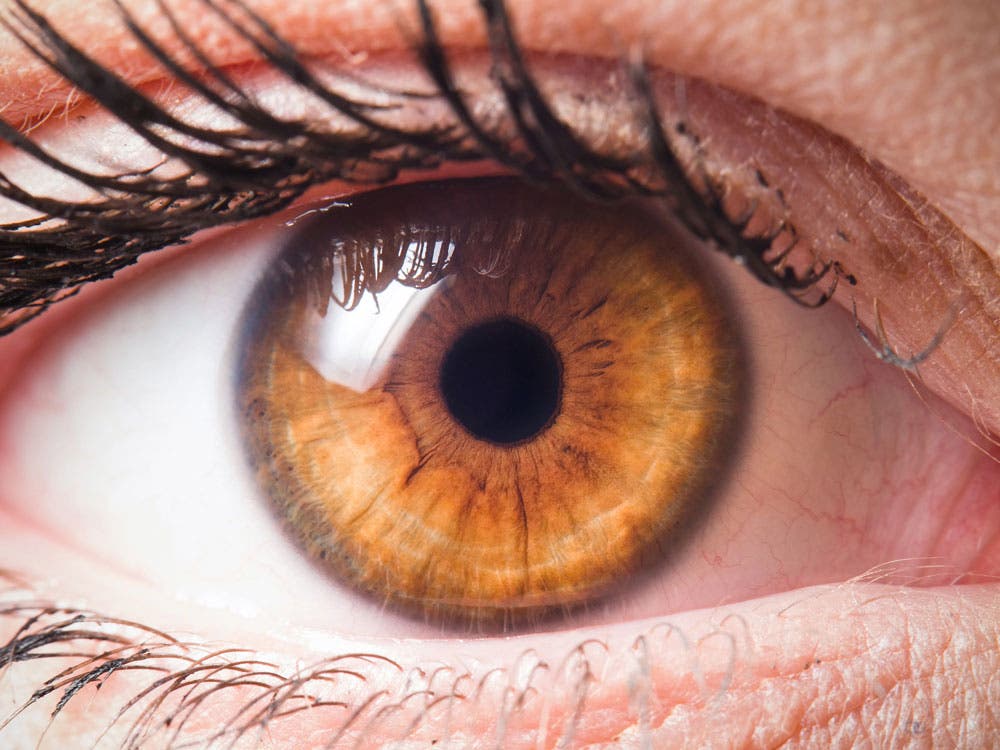
Macro photography is extreme close-up photography, usually of very small subjects and living organisms like insects, in which the size of the subject in the photograph is greater than life size. Macro being able to capture fine details that a human eye may struggle to notice.
Techniques to achieve a macro photo:
- You can purchase lens' devoted to macro photos; these tend to be expensive though. In which case, most digital cameras have a macro setting you can use; the effect is less effective though.
- Use point of focus or manual focus.
- Use a tripod to frame the object and background, apply compositional rules where possible.
- Experiment with depth of field, you will be very close to your subject which results in a sudden drop of focus, to overcome this you might want to maximise your depth of field, therefore, shoot at F16 F22. In other circumstances, you may like the drop in focus in which case use a lower F-stop.
- Work with a low/medium ISO from 100 to 400.
- Apply manual exposure and the exposure meter to ensure that the subject is adequately exposed.

Personal Creation/Final Pieces
Using a Nikon D300S with a macro lens attached to it, I captured various objects close-up to reveal their details.
Here I captured a close-up on my eye. The lens captures the fine outline of each individual hair on my eyebrow and my eyelashes. It also captures the rough detailings of skin under my eye that are bumpy; this defeating the capture quality of a regular lens if used in the same composition.The settings were F8 aperture, shutter speed at 1/125 due to the studio lighting, and ISO 200, with focal length on 105mm.
Here I captured a hand full of granules. I thought capturing these would help to present the ability that a macro lens holds. The lens captures the small detailing on the granules, making them appear defined as small rocks.
The settings were F8 aperture, shutter speed at 1/125 due to the studio lighting, and ISO 200, with focal length on 105mm.
Capturing a paintbrush I believed would present the detail of all the bristles. Each bristle is presented in fine detail while still bundled together.
The settings were F8 aperture, shutter speed at 1/125 due to the studio lighting, and ISO 200, with focal length on 105mm.
Using the macro lens helped to define the veins in the petals of this flower. An issue with this photo is the lack of focus and over-exposure. Using a macro the subject being taken must be perfectly still and in the correct depth of field which is very specific, or the focus will easy go leaving a blur. This removed the potential of the lens capturing better detailing on this flower.
The settings were F8 aperture, shutter speed at 1/125 due to the studio lighting, and ISO 200, with focal length on 105mm.
With this flower, I was able to lower the exposure and capture the flower in the correct focal point. With this, the lens was able to capture the lining of the individual seeds and stems.
The settings were F11 aperture, shutter speed at 1/125 due to the studio lighting, and ISO 200, with focal length on 105mm.
Overall, I'd say the majority of the photos met my intentions of presenting the ability that a macro lens holds. I had minor issues with focusing the photo and exposure settings since macro lens' are a lot more sensitive to these settings and require precision, but with practice, this can be resolved.
Progression
I believe for certain themes of photography macro photography is the perfect approach, but for my personal investigation, what I will be pursuing will not require photos like macro photos. So I don't believe this technique will be used moving forward.


